Form and Field
Get from a fresh install to a fully categorized takeoff in about 15 minutes.
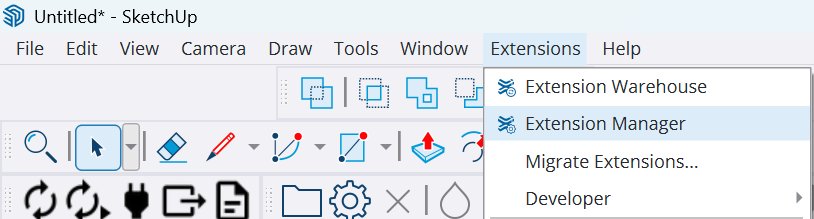
Open the Extension Manager
In SketchUp, go to Extensions → Extension Manager.
Install the .rbz file
In the Extension Manager, click Install Extension at the bottom. Navigate to your Downloads folder and select FF.rbz.
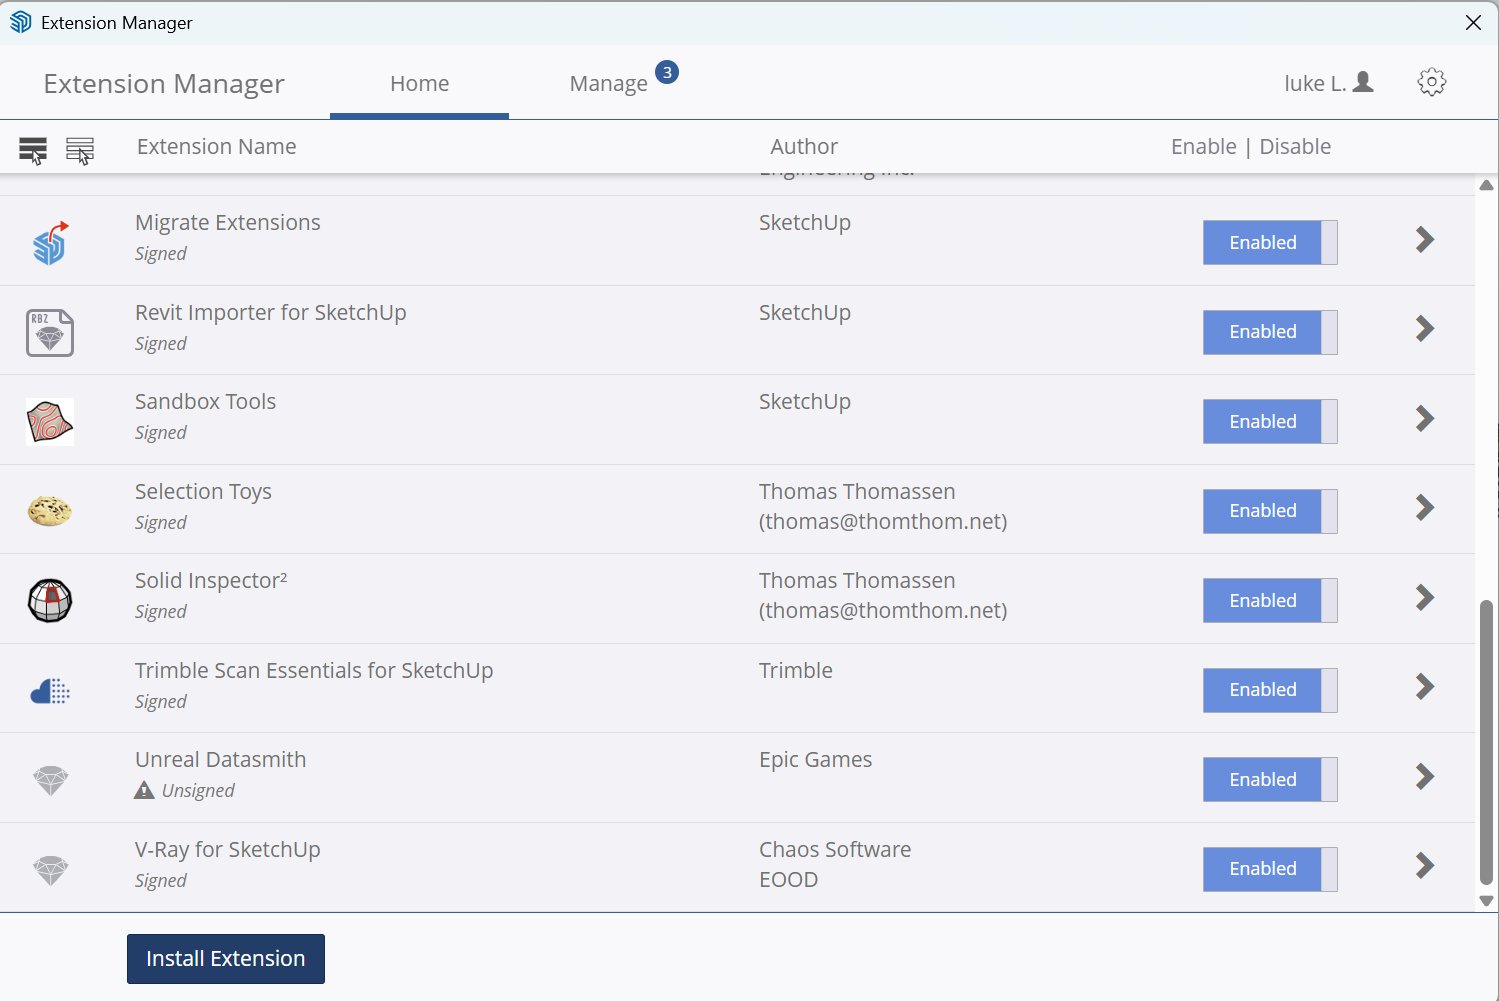
Restart SketchUp when prompted.
Activate your license
On restart, Form and Field prompts you for a license key. Paste the key from your purchase confirmation email. Once verified, the FF toolbar and menu appear.
Import your model
Import a Revit or IFC file into SketchUp. FF works with any model that has named components — it's optimized for architectural and structural imports.
Choose a template and scan
Click Scan Model (the UFO icon). FF asks you to select a category template:
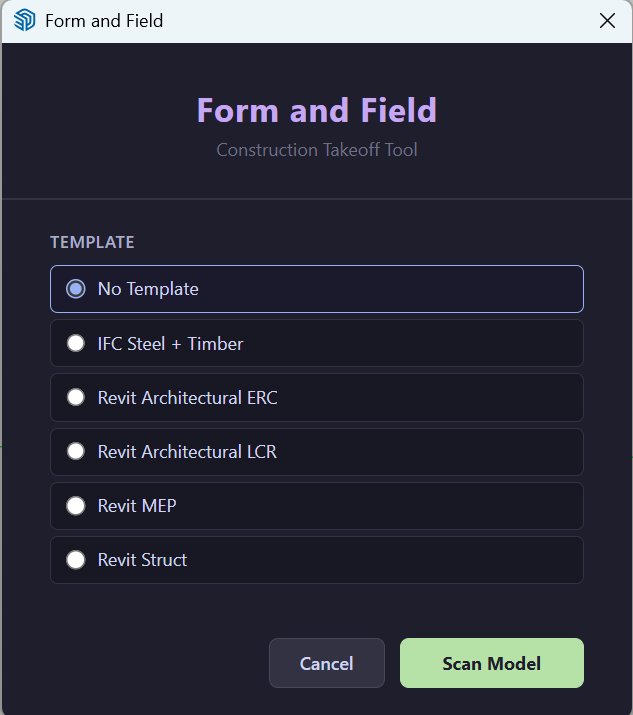
FF ships with starter templates:
IFC Steel + Timber — structural IFC exports (IfcBeam, IfcColumn, IfcSlab)
Revit Architectural ERC / LCR — two variations for architectural Revit models
Revit MEP — mechanical, electrical, and plumbing families
Revit Struct — structural Revit models
Review the dashboard
The Takeoff Report opens with your results organized by container and category.

In this example: 2,856 entities across 64 categories — Foundation (Footings, Slabs, Stem Walls), Structure (Wall Framing, Sheathing, Structural Steel), Full Enclosure (Doors, Fascia, Garage Doors), and more.
Cycle through categories
Click each category to isolate it — everything else hides so you can visually confirm the right objects are in the right bucket.
Generic Models is typically the biggest category to sort. This is where the parser puts anything it couldn't confidently classify.
Sort with Hyper Parse
Open Hyper Parse (Extensions → Form and Field → Hyper Parse) to work through miscategorized items.
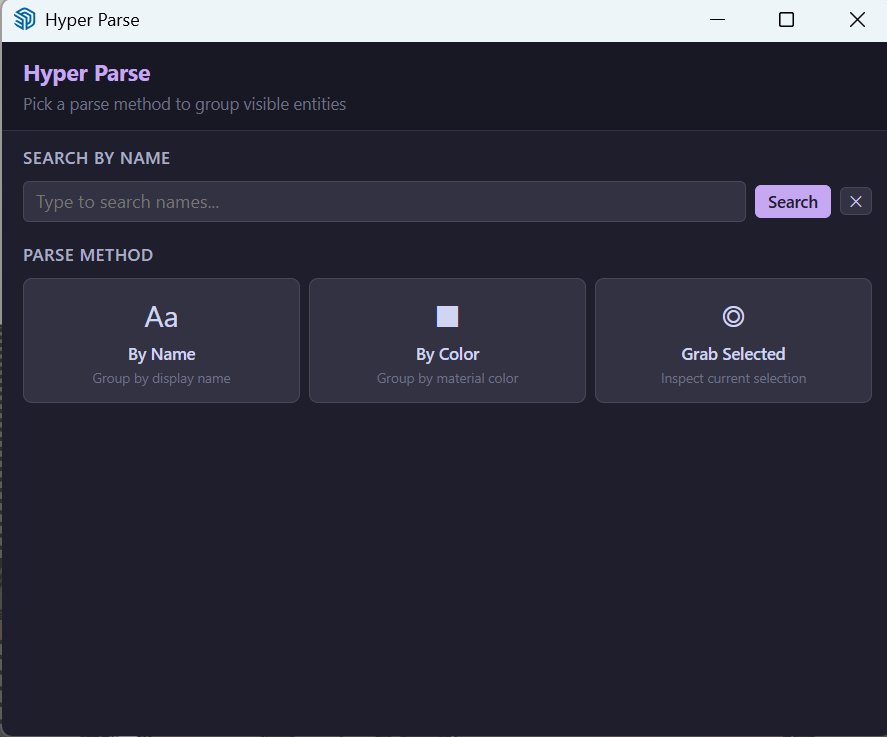
HP gives you three methods:
By Name — groups entities by definition name. Good for well-named models.
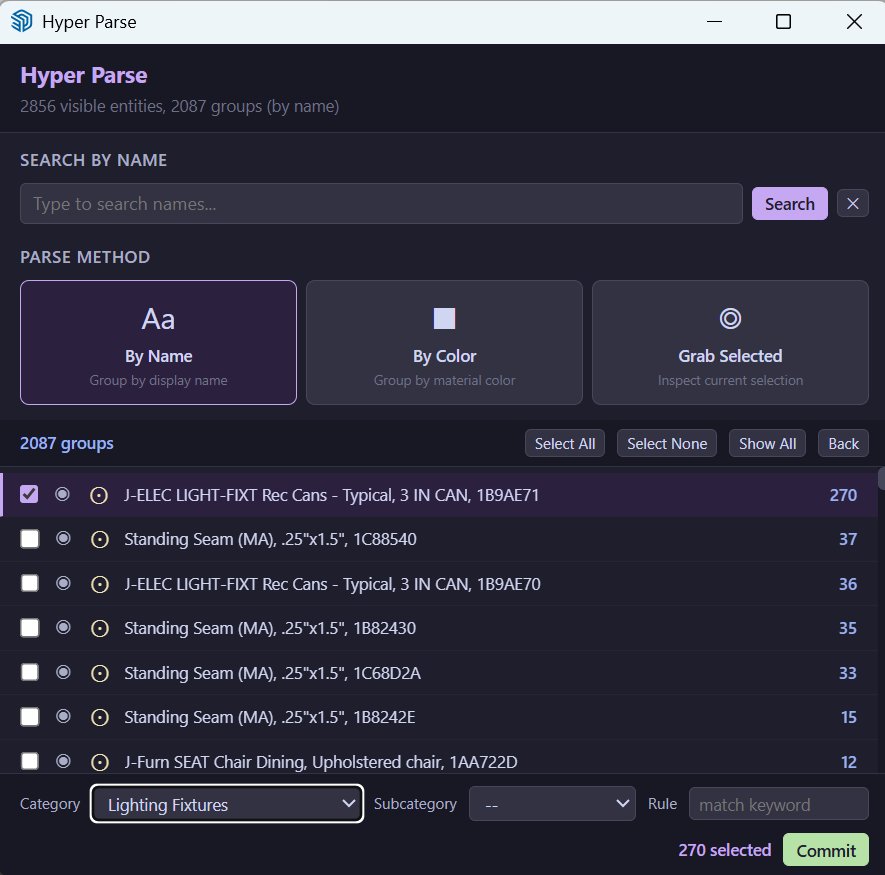
Here, By Name found 2,087 groups. Check the ones you want, pick a category, and click Commit.
By Color — groups by material color. Useful for color-coded models.
Grab Selected — select an entity you recognize, then inspect its properties.
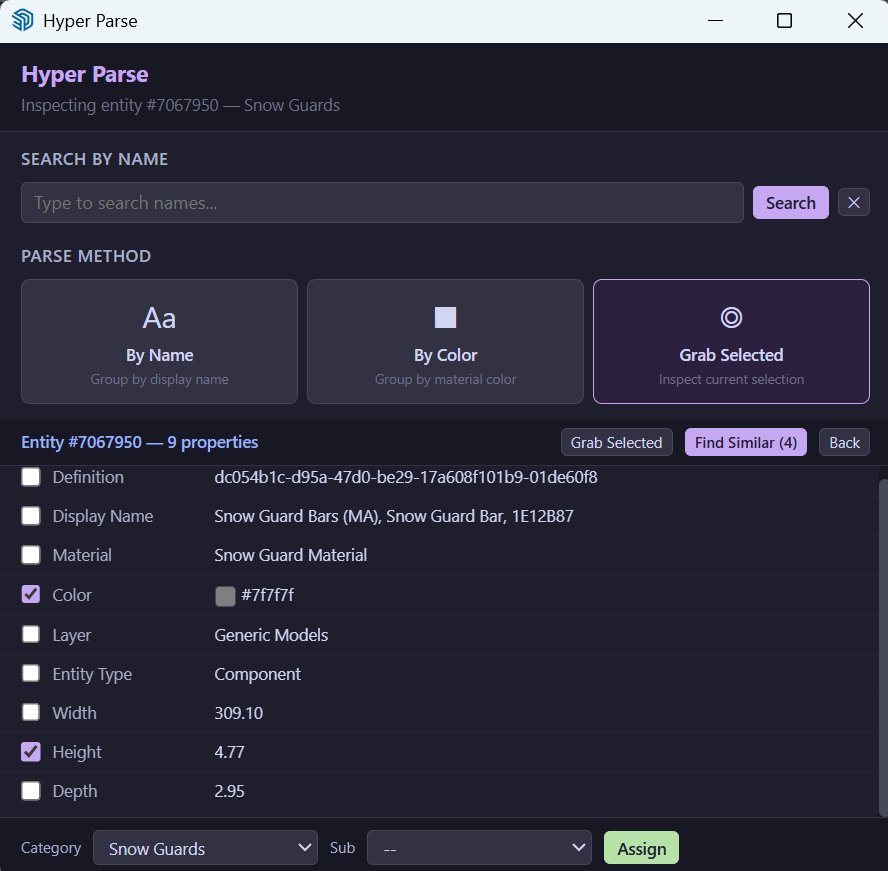
Here, a Snow Guard bar was selected. Check Color and Height, click Find Similar (4) to highlight all matches, then assign them.
Save your template
Go to Extensions → Form and Field → Category Templates.
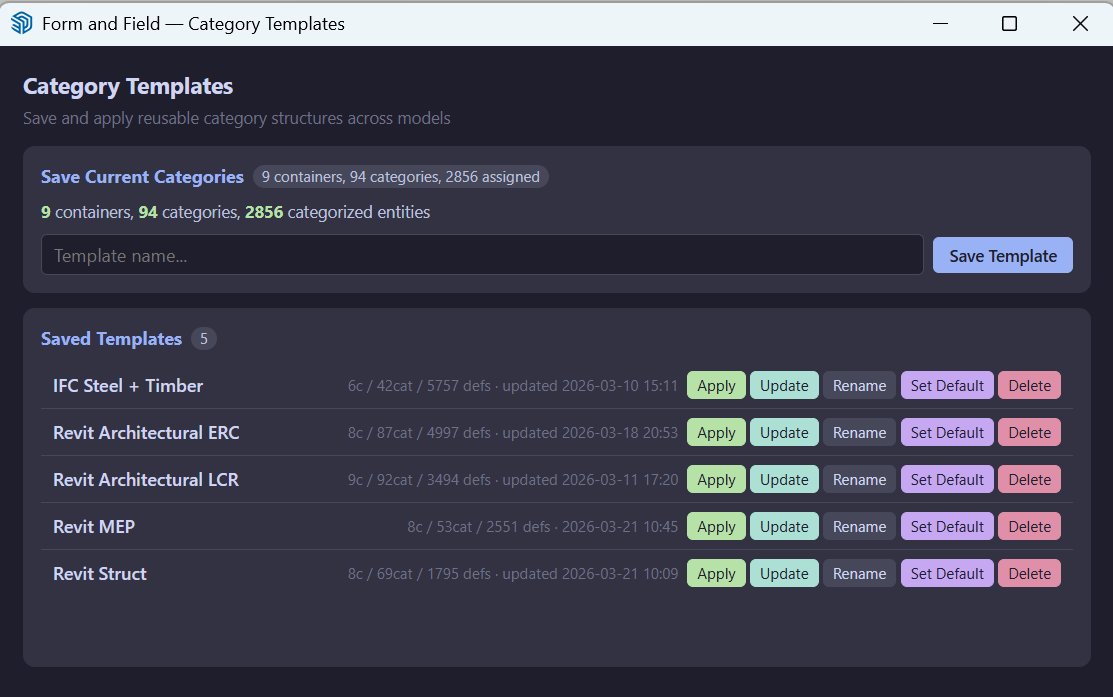
Either Update the template you started with or type a new name and Save Template. When updated models come in, the same naming conventions map to the same categories automatically.
Customize cost codes
Open Extensions → Form and Field → Cost Code Editor.
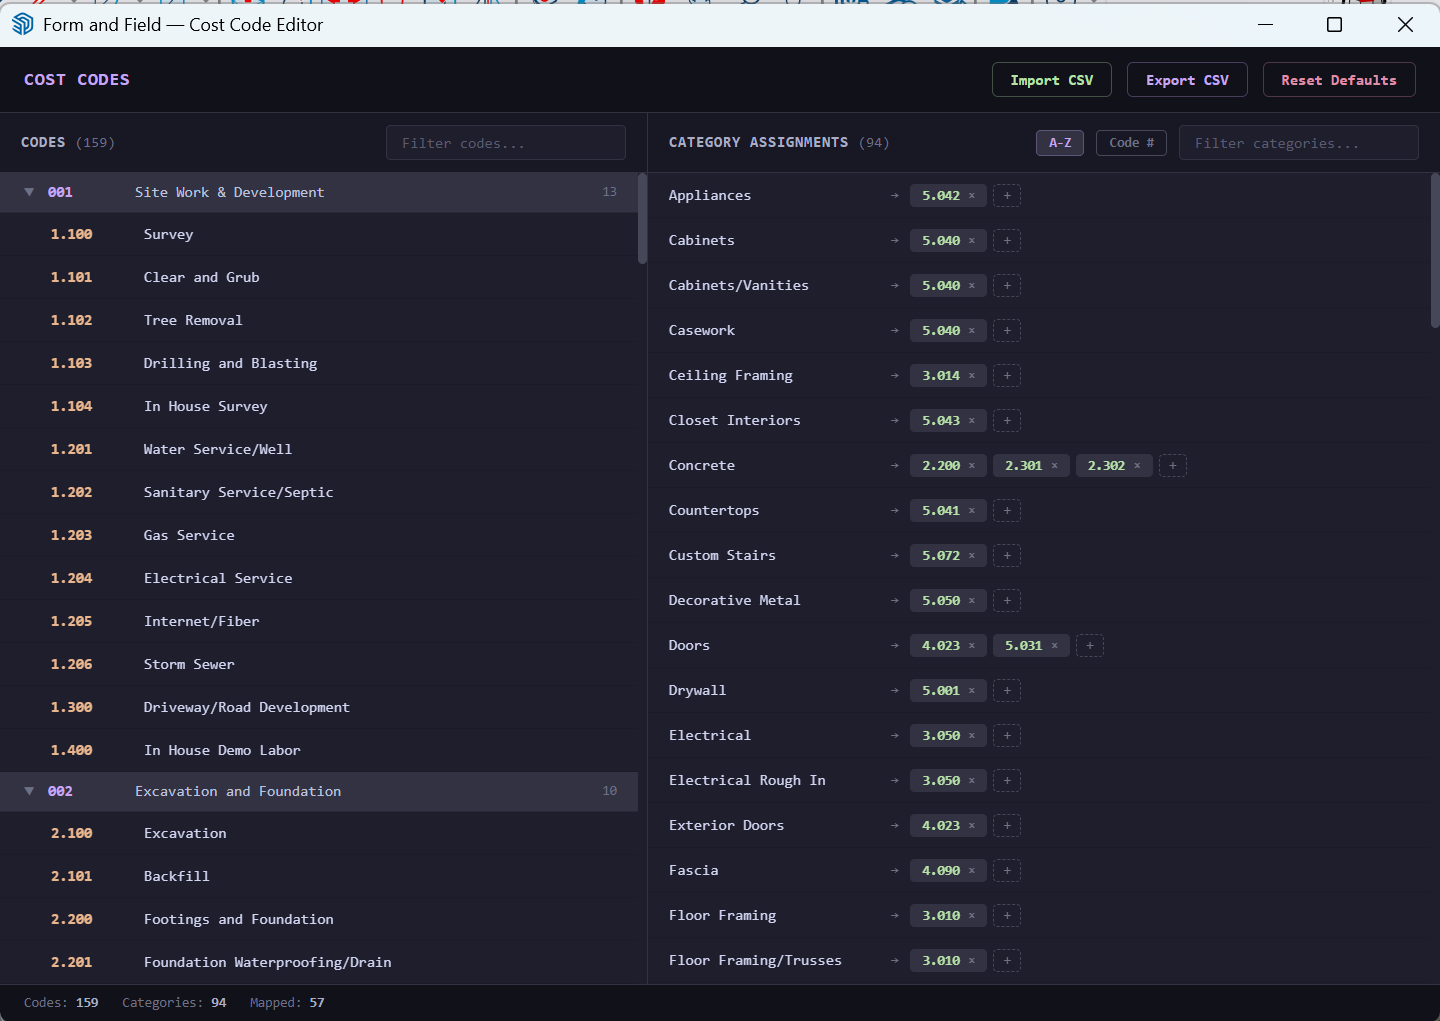
The left panel shows your cost code library organized by division (001 Site Work, 002 Excavation and Foundation, etc.). The right panel shows category assignments — each category like Appliances, Cabinets, Ceiling Framing maps to one or more cost codes. Customize every code to match your company's system.
Use Import CSV to load your company's code set, or Export CSV to share it. Assignments save with the template.
Form and Field v11 — March 2026